I can’t see my wireless network in the list?
It’s frustrating when you can’t find your Wi-Fi network in the list. There are several reasons why you can’t see your wireless network, which we will help you fix.
Why Is My WIFI Not Showing Up on My Laptop?
In general terms, these are the reasons why you can’t see your wireless network on your computer:
- The connection issues
- Wi-Fi not working
- Outdated Wi-Fi drivers
- If you have done wrong configurations on your computer or Wi-Fi router.
How to Fix A Wireless Network That Is Not On The List?
Here we will look at the possible solutions to have your wireless network back on the list. Try each at a time and see what works for you.
This is how you should fix your Wi-Fi if it is not on the list:
- Enable the wireless network
- Turn on WLAN AutoConfig Service.
- Update your drivers
- Restart your Wi-Fi router or modem
- Enable SSID broadcast
- Check your interference
These fixes can be used in windows 10, 7, and 8.
Fix 1: Ensure the Wireless Network or WIFI Is Enabled.
If windows disable your WIFI service, then you can’t see your Wi-Fi in the list. Here, we will look at two ways to enable WIFI on your computer.
Step 1: Use a Wi-Fi switch to enable Wi-Fi
Make sure you are within the Wi-Fi range as you do this first step.
Some laptops have a key or switch on the keyboard to switch Wi-Fi on or off. Ensure that the switch is on to enable Wi-Fi service.
Step 2: Check your wires network settings
If there is not Wi-Fi switch on your computer, you need to check on the system settings.
- Right-click the internet icon. Select Network and Sharing Center.
- Select ‘Change adapter settings
- Right-click WiFi and select Enable. If the Wi-Fi is enabled, you will notice ‘Disable’. In some computers, WiFi is also indicated as a Wireless Network connection.
- Restart your computer and connect WIFI again.
Fix 2: Turn Your WLAN Autoconfig Service On.
WLAN AutoConfig Service configures connectivity and security settings. Its also indicated as Wireless Configuration in Windows XP. If it’s enabled, the WLAN AutoConfig settings apply to IEEE 802.11 network adapters that are in your computer.
Once the Wi-Fi is available, it is connected to the preferred wireless network automatically. Follow the following steps to fix this issue:
- Press Windows key + R on your keyboard to invoke the ‘run box’. Type services.msc, and press enter.
- Right-click WLAN AutoConfig and if you are using Windows XP, use the wireless connection button. Then click Properties
- Click Automatic in the Startup type. Click apply and then select OK.
- Restart your window and connect to Wi-Fi again to see if your WIFI is on the list.
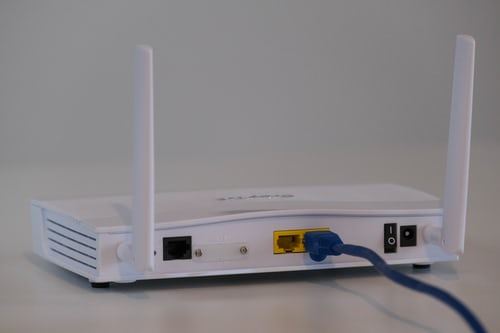
Fix 3: Update Wi-Fi Network Drivers
The WIFI network driver allows communication between the operating system and the network and wireless adapters. One of the possible reasons why your wireless network is not showing up may be the drivers are corrupt, missing, or outdated.
Here we will look at the best two ways to update your drivers.
I. Manually
To update drivers manually, you need to search for the right ones on the manufacturers. Look for the ones that match with your Operating System-OS, then install them on your computer. As we had noted in our previous article on How to Fix A Computer That Won’t Turn On, manual needs computer skills and consumes much time.
II. Automatically
If you are impatient to update drivers manually, you can do that automatically on various online sites.
These sites detect the condition of your drivers and install the right drivers for your computer. Automatic updates save you a lot of time, and you don’t have to worry about the operating system you are using, the sites will detect it for you.
Also, you don’t have to worry about making any mistakes in the process, you don’t need to have comprehensive computer skills.
You can use their free versions or go by the premium ones. This depends on the options available on a specific website.
Each site has its guidelines and procedures to follow. Read carefully and follow the process indicated on the preferred site. This should take you few clicks and you are done.
The final step is to restart your computer and connect to WiFi again.
Fix 4: Restart Your Wi-Fi Router or Your Modem.
If you can see your home WIFI in the list, you can check it’s the Wi-Fi itself has an issue. Check the Wi-Fi device you use and its components such as the router, device interference, and SSID broadcast.
The problem can be an issue to do with the Internet Service Provider- ISP. Try to solve this, you can restart your wireless router or your modem.
During this exercise, anyone connected to the wireless network will be disconnected for a while, till the time the router or modem will be switched on again.
Here are the steps to follow:
- Disconnect your modem or wireless router from the power source. If you’re your modem has a battery backup, remove it.
- Let them be disconnected for about 30 seconds.
- Connect your wireless router or the modem back to the power source. Put the battery back if your modem had it.
- Reconnect the WiFi network on your computer and see if shows up.
Fix 5: Enable SSID Broadcast.
Service Set Identifier Broadcast-SSID the component that enables the Wi-Fi network to be visible to the network adapter.
Some people can disable SSID broadcasts for security reasons. This makes WIFI to be invisible to others. To connect to such Wi-Fi, you will need to configure your profile settings, including the name of the WIFI manually.
After the first connection, devices will remember this wireless network, you don’t have to repeat the same process if you had connected once.
Fuse these steps to enable the SSID broadcast. The process might vary depending on the type of Wi-Fi router you are using. In our steps, we used a TP-Link WIFI router.
- Check the username, password, and IP address of your wireless router.
- Open the browser on your computer or phone that has an internet connection.
- Type the IP address you view on the wireless router on the browser and click enter.
- Type the username and password, and login
- On the wireless settings, click the box with Enable SSI broadcast and select save
- Restart windows on your PC and connect to your Wi-Fi again.
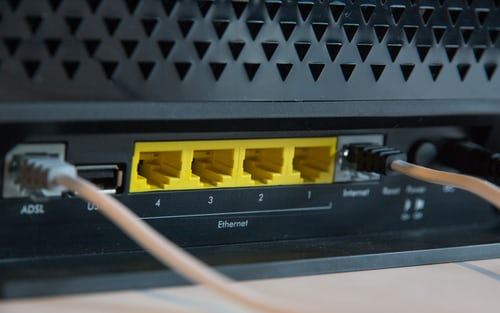
Fix 6: Check Your Device Interference.
Your wireless network can be interfered with by many devices in your houses like microwave ovens, Bluetooth speakers, or cordless phones. They use the same 5GHz or 2.4GHz frequencies. You need to check if the devices are the ones causing this problem.
Do these simple steps:
- Turn off all those devices and disconnect them from the power source.
- Try to reconnect WIFI from your PC and see if it shows up.
- If your WIFI shows up in the list, the problem was interference from your devices. To solve this, move your wireless router or modem to another location to make sure they are not in the same line with your household devices.
- If the problem continues, you can opt to buy a GHZ router that uses 5GHZ. Many household devices use 2.4GHZ. There will be no interference.
Tip: WiFi Network Frequency
If you are connecting Wi-Fi for the first time, you need to check if the network frequency matches your computer and your wireless router or modem. Mostly, the Wifi frequency network has 5GHZ and 2GHZ. The good thing is that the most recent routers are Dual Band Model.
You can check the Wi-Fi frequency on windows or routers manufacturers websites. On windows, to check WIFI network frequency, go to command prompt and type netsh WLAN show drivers, and press enter. It will show you all the supported protocols.
We believe that the above ways will give you a solution, and your Wi-Fi will show up on the list.
