What Does a PC's BIOS Do, and When Should I Use It?
pThere are several ways your PC uses BIOS It tells the computer how to perform basic tasks like booting and keyboard control BIOS is also used to identify and configure the hardware in a computer such as a hard drive memory floppy drive CPU optical d
BIOS, as a major system component, perform major tasks on computer bootup and beyond. However, knowing how to use it, when, and how to repair it can be a challenge. I have compiled the best tips on what BIOS does and when you need it.
There are several ways your PC uses BIOS. It tells the computer how to perform basic tasks like booting and keyboard control. BIOS is also used to identify and configure the hardware in a computer, such as a hard drive, memory, floppy drive, CPU, optical drive, and other components. Its two main operations are determining which peripheral devices are available such as keyboard, mouse, video cards, disk drives, printers, etc., and loading the operating system into main memory.
Read on to understand BIOS in detail. You will know what it does, how to repair it, it is important to your system, how to know it's corrupted, and much more.
What Does a PC's BIOS Do, and When Should I Use It?
The Basic Input-Output System (BIOS) is a set of routines in a computer stored on a chip on the motherboard.
It serves as a bridge between the hardware of a computer and its operating system.
Without the BIOS, the operating system on the PC would be unable to communicate with or control the hardware.
If its settings are incorrectly configured, the BIOS can slow down your device by up to 40%.
Admittedly, as new microprocessor and motherboard chipsets are introduced, the BIOS options become even more perplexing.
As a result, many experienced technicians are still perplexed by the jargon-laden and perplexing options available in a modern computer's BIOS setup program.
What is the difference between BIOS and CMOS?
Because CMOS and BIOS are closely related to pc settings, they are referred to as CMOS and BIOS settings. The special RAM chip on the mainboard is known as CMOS. It is used to save system parameters.
The BIOS system setting program is used to achieve parameter settings. As a result, you can set the CMOS parameter using the BIOS setting program.
Simply put, CMOS and BIOS settings are the same things. The BIOS program is saved on the main board's EEPROM Flash chip.
CMOS storage is used to save data after BIOS configuration, such as hardware configuration and parameter settings, such as conventional BIOS system password and device starting order, etc.
Where is BIOS?
BIOS software is found on all modern computer motherboards.
Because the BIOS is part of the motherboard hardware, BIOS access and configuration on PC systems are independent of any operating system.
It makes no difference whether a computer is running Windows XP, Windows 10, Windows Vista, Windows 8, Windows 7, Unix, Linux, or no OS at all. BIOS operates independently of the operating system environment and is not reliant on it.
The purpose of BIOS in your Windows 10 computer
The following are the functions of BIOS in your PC:
- Power-On Self Test (POST)
POST is an acronym for the Power-On Self Test that your computer performs when you turn it on.
POST checks your PC's hardware and ensures that nothing is out of order and that your operating system is error-free.
POST examines everything from your keyboard and disk drive to your computer's RAM speed and integrated ports.
If everything is in order, POST will proceed as usual and your PC will boot normally.
If an error is detected, BIOS will generate an error message, which may take the form of displayed text or a series of error-indicating beeps.
If the POST is successful, the system will usually emit a beep. If the test fails, the system will typically emit a series of beeps.
The number, duration, and pattern of these beeps can be used to determine the cause of the test failure.
- Bootstrap loader
The bootstrap loader is a program that lives within your computer's EPROM or ROM and is tasked with reading your Computer's hard drive boot section in order to progress the entire operating system load.
When you restart your computer, the bootstrap loader activates POST and loads Windows 10 into memory.
The bootstrap loader has been replaced in newer PCs by an EFI, or Extensible Firmware Interface.
- CMOS setup
Within its CMOS, your computer stores all low-level settings such as system time and hardware configuration.
This means that any changes you make to the structure of your BIOS are saved on a special memory chip known as the Complementary Metal-Oxide Semiconductor, or CMOS.
The CMOS setup is in charge of configuring your password, time, and date.
- Handling Hardware Interrupts.
Handling Hardware Interrupts is concerned with the need for PC hardware. The BIOS service function is implemented by invoking the interrupt service routine.
These services are divided into several groups, each with its own specialized interrupt.
Furthermore, incorrect BIOS settings can damage computer hardware or even burn the motherboard. It is strongly advised not to change the settings too frequently.
- Setting Records
You can change various settings in the BIOS, such as the size of the onboard display card's internal storage.
Is it possible to upgrade or update a BIOS chip?
Adding more memory to a BIOS chip as an upgrade requires replacing the existing BIOS chip with a newer, more advanced BIOS chip.
If the BIOS chip is flash, the data on it can be updated.
The BIOS can be updated using specially designed software to fix problems or add new features to the motherboard.
BIOS Manufacturers
Here are the popular BIOS manufacturers:
- Dell
- Insyde Software
- IBM
- American Megatrends
- Phoenix Technologies
- BYOSOFT
How to enter BIOS setup on Windows PCs
You'll need access to your computer BIOS if you've encountered an annoying computer bug or need to modify CPU hardware for a newly upgraded processor.
Laptops and PCs with Windows 10 make accessing, updating, and checking your BIOS a breeze by providing two simple methods to achieve the desired results.
Let's take a look at both approaches.
- Using hotkeys to access BIOS when booting up your PC
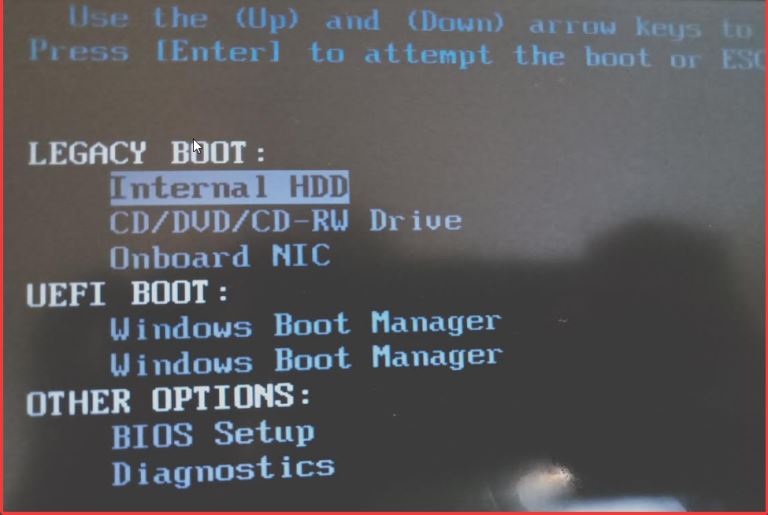
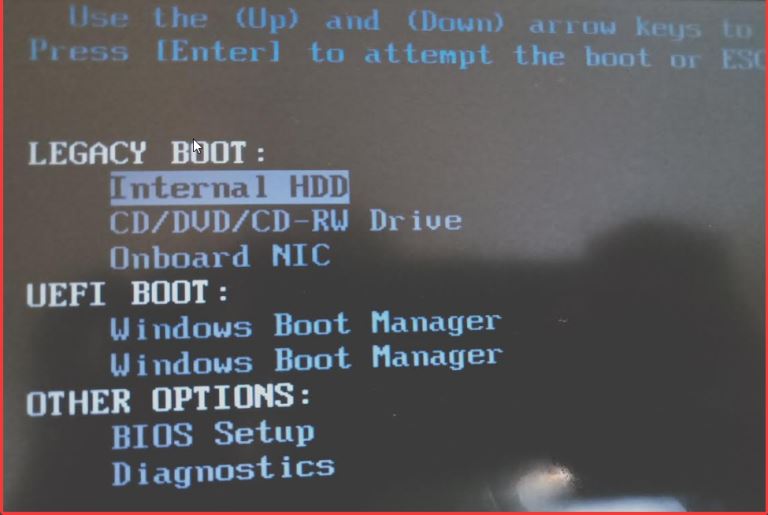
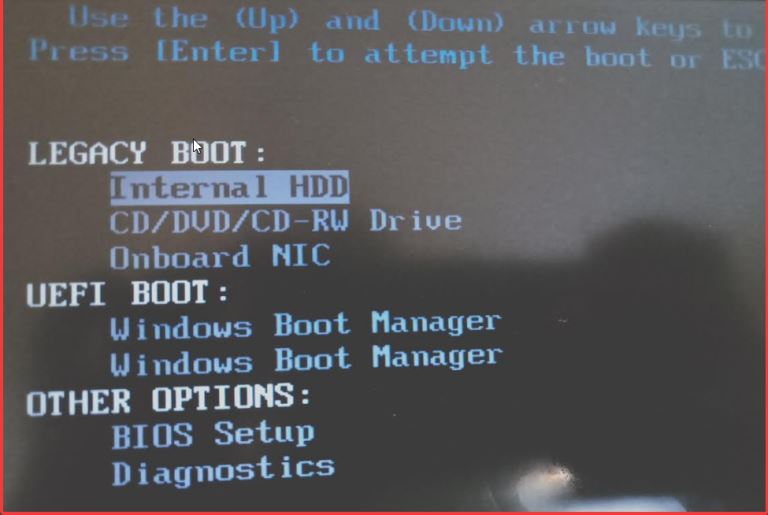
Some computer manufacturers provide users with a number of keys or key variations to press while booting in order to enter BIOS.
On most devices, this is the F2 key, but there are a few exceptional cases.
It may be too fast for you to notice, but your PC goes through a rapid POST process to get your startup screen loaded up as quickly as possible. You can also access your BIOS by clicking your PC's designated hotkey during this timed window.
Unfortunately, different PC manufacturers were all on different pages when it came to defining a definitive BIOS key.
F10 or the escape key is commonly used on HP laptops. DEL and F2 are the most commonly used PC hotkeys.
If you're not sure what your brand's hotkey is, the table of common BIOS keys by brand below may be of assistance.
|
Brand |
BIOS Hotkeys |
|
Dell |
F2 or F12 |
|
Acer |
Del or F2 |
|
Lenovo |
Fn + F2 or F2 |
|
Lenovo desktops |
F1 |
|
Lenovo ThinkPads |
Enter + F1 |
|
Toshiba |
F2 |
|
Origin PC |
F2 |
|
Sony |
F1, F2, or F3 |
|
HP |
Esc or F10 |
|
Asus |
Del for motherboard and F2 for PCs |
|
MSI |
Del for PCs and motherboards |
|
Microsoft Surface Tablets |
Long press volume up button |
|
Samsung |
F2 |
While your computer is booting up, press your assigned BIOS hotkey to bring up the BIOS setup utility screen.
Some manufacturers require multiple hotkey presses, while others require pressing a button in addition to the hotkey.
Check the user manual for your PC or the manufacturer's website for the most up-to-date information.
For example, on an HP ENVY, HP Pavilion, HP OMEN, HP EliteBook, HP Stream, and other models, pressing the F10 key as soon as your PC status screen appears will take you to the BIOS setup screen.
- Use the Start menu to access BIOS settings on your PC
Computers are now more technologically advanced than ever before, booting up in seconds in front of our eyes. This leaves little room for pressing hotkeys and can be perplexing for those attempting to access their BIOS settings.
This method can be completed by accessing your computer settings– for PC users who are unable to catch that tiny window to use their hotkey.
Follow the steps below to access BIOS settings:
Step 1: Navigate to your Windows settings.
Go to the Windows start menu and select "Settings" from the left panel. You can also access your Windows settings by pressing Windows + I on your keyboard.
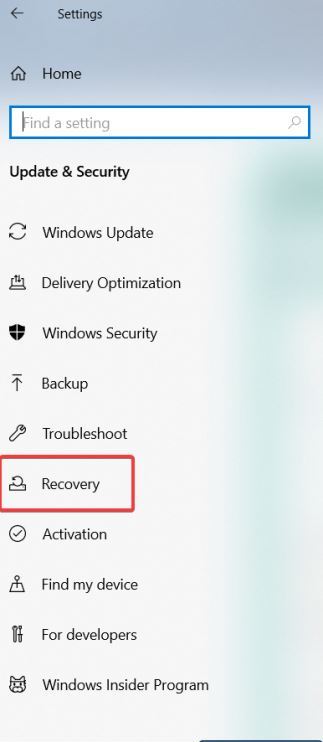
Step 2: Go to "Update & security."
You may need to scroll down in this window to find the "Update & security" button.
Step 3: Click on "Recovery."
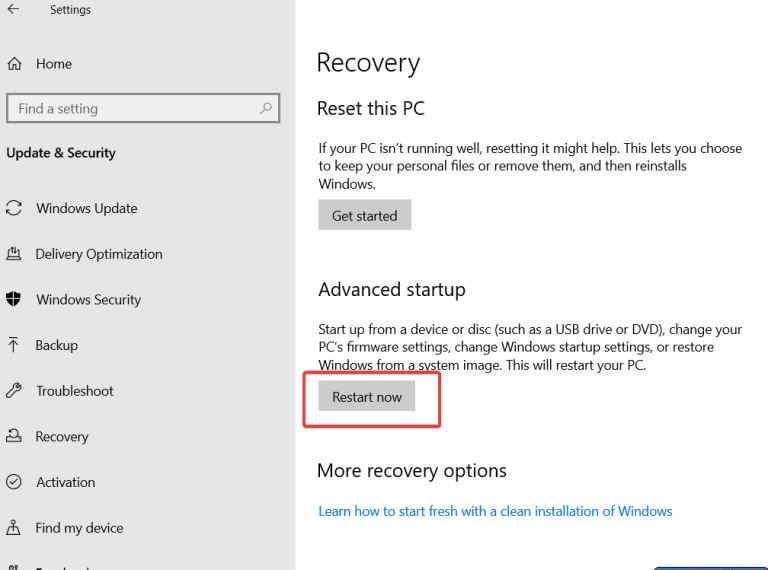
Step 4: Select "Restart now."
You'll find a "Restart now" button under "Advanced startup" that allows you to reboot your PC for configuration or restoration.
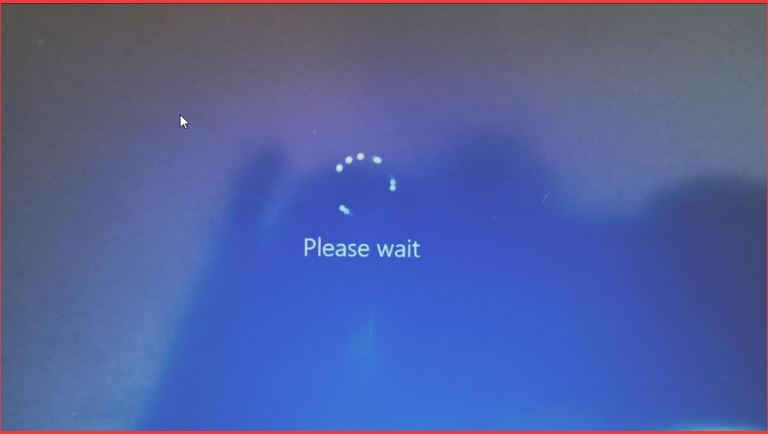
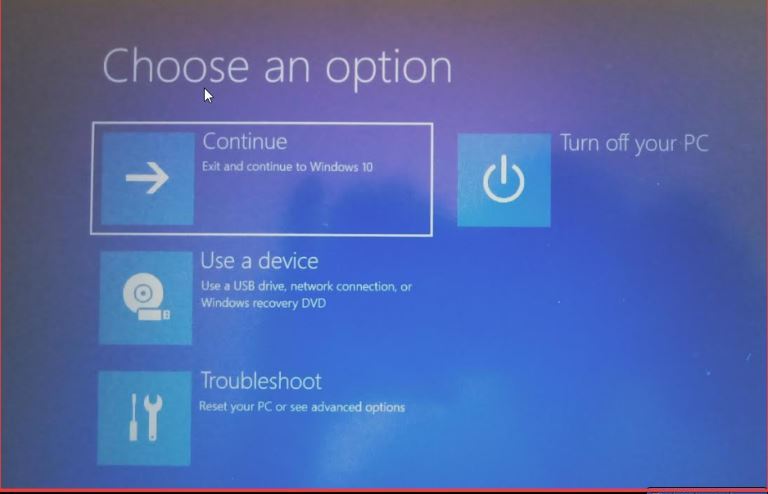
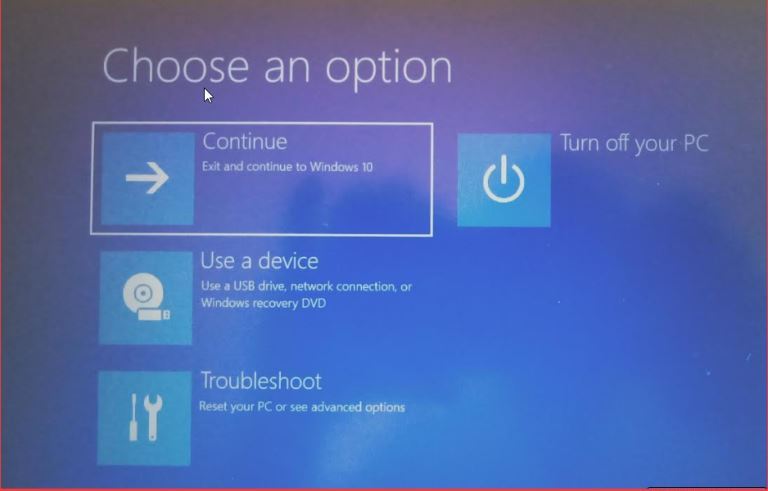
When your computer restarts, you will be presented with a special menu that allows you to "Use a device," "Continue," "Turn off your PC," or "Troubleshoot."
Step 5: Click "Troubleshoot."
Select "Advanced Options," then "UEFI Firmware Settings" from this window. This will allow you to access the BIOS menu on your Windows 10 computer.
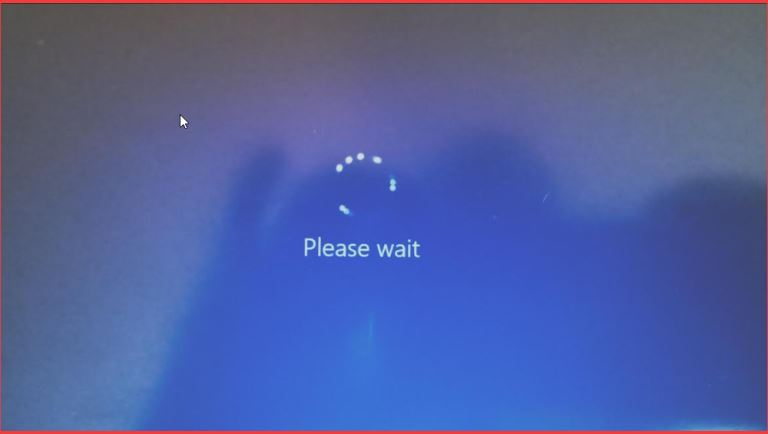
Step 6: Confirm and restart.
NOTE: The above methods will also work for your older operating system if it is running Windows 8 or Windows 8.1.
Can your computer run without BIOS?
The CPU has no idea how to share information with the rest of the hardware without BIOS. True, early computers were programmed with switches.
The switches, however, were used to load instructions into memory for the CPU to execute. Humans provided the first BIOS for those computers.
Consider setting 8 or 16 switches and loading one of the hundreds of instructions to start the computer.
I've worked on computers that used punch cards, punched paper tape, or magnetic tape to load a program. Even back then, there had to be some BIOS to make that happen.
Most computers had had some boot loader program so that the CPU would have something useful to run when this was first powered up, that something useful being to load the operating system that was on disk (or something similar to disk) and run it.
In the case of BIOS, it also provided some basic services for interacting with the screen and keyboard, as well as a standard way to initialize hardware - sometimes even leaving a report behind to let the OS know what hardware was present (but any sensible OS would determine that for itself.)
A feature like this is common in other boot loaders.
External switches could control the CPUs of very early computers.
One switch would toggle the CPU between STOP and GO. Another set of switches could be used to load values (such as a program) into memory or set some CPU registers to a specific value (the instruction pointer register.)
Those early computers didn't have a boot loader, so powering up the computer required a person sitting in front of it flipping switches. However, that was a long time ago.
In some cases, the boot loader program included a fairly sophisticated operating system - the original Apple IIe and early Macintoshes did this, though loading a replacement OS from disk was also a basic feature.
BIOS has come to refer to a specific set of features compatible with the IBM-PC BIOS and clones.
For the PC "Wintel" architecture, a modern boot ROM has a far more sophisticated system, and individual devices contribute to the code executed on reboot.
Other PC architectures (particularly those based on ARM) are similarly standardized, but cell phone systems lack vendor-independent standards.
How do I know if BIOS is corrupted?
A corrupted BIOS will almost always result in malfunctions or even the inability to boot.
Luckily, basic graphics will be initialized, and an error, possibly a checksum error, will be displayed.
If you are unsure and it still boots into the bios, you can try "in-place-upgrade" or check for the latest version. Otherwise, consult the mainboard manual for recovery instructions.
The absence of the POST screen is one of the most obvious signs of a corrupted BIOS.
The POST screen is a status screen that appears after you turn on your computer and displays basic hardware information such as the processor type and speed, amount of installed memory, and hard drive data.
How does BIOS get corrupted?
- BIOS update flashing to failure– losing power during the process can corrupt the BIOS. This has the potential to brick the motherboard. Most systems have a section of the BIOS that cannot be rewritten to recover in this situation but don't rely on it. To put it another way, never flash your BIOS during a thunderstorm.
- A virus on your computer re-flashes the BIOS to destroy it. Because these are generally motherboard specific, while it is possible, few viruses would bother.
- The flash memory (or, in older systems, UVROM or ROM) fails. Re-flashing the memory by running a BIOS update, if enough is working, will sometimes correct the bit, but it could not go well again in the future.
How to fix a corrupted BIOS
The BIOS is a very important component of your computer because it is in charge of starting it and checking its hardware.
Unfortunately, BIOS issues can arise and prevent your system from booting. Corrupted BIOS can be a serious issue, but there are only a few solutions for your Windows computer.
Below are the best ways to fix a corrupted BIOS
- Remove the motherboard battery
By removing the battery, your BIOS will be reset to factory settings, and you should be able to resolve the issue.
To remove the motherboard battery, you must open your computer case, which in most cases will void your computer's warranty, so keep that in mind.
If your computer is still under warranty, you should take it to the official repair center and have them fix the problem.
If you decide to do this yourself, simply remove the battery and wait 5-10 minutes for it to completely drain.
- Reset the BIOS
You can easily resolve this issue by resetting your BIOS.
There are several ways to accomplish this, the most basic of which is to enter BIOS and reset it to default settings. To do so, take the following steps:
While your computer is booting, keep pressing Del or a specific F key to enter BIOS. Typically, there will be a message instructing you to press a specific key to enter SETUP.
If you cannot locate this key, consult your motherboard's manual to determine which key is used to enter BIOS. Once in BIOS, look for the Load Setup Defaults option.
- Take out your graphics card.
Many PCs have integrated and dedicated graphics cards, and you can fix the problem with a corrupted BIOS by simply removing your graphics card and connecting your monitor to the integrated graphics card.
NOTE: Removing the dedicated graphics card may void your computer's warranty.
- Replace the motherboard.
If the problem persists, it is possible that your BIOS chip has been damaged, and the only way to resolve this issue is to replace your motherboard.
If your computer is still under warranty, take it to the repair shop and ask them if they can fix the problem.
Corrupted BIOS can be a serious issue, but I hope you were able to resolve it using one of our solutions.
How to use change settings in BIOS
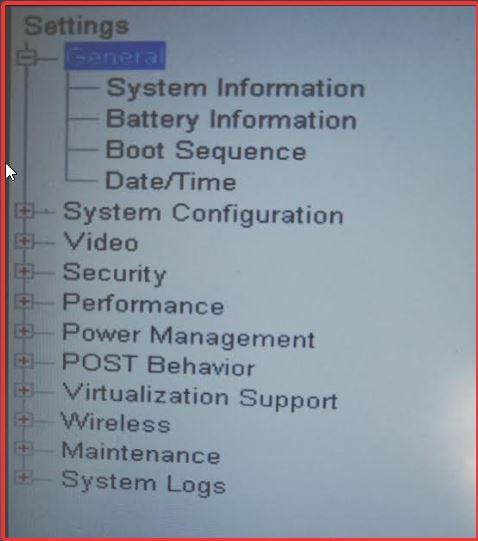
BIOS supports several hardware configuration settings, which can be modified using the setup utility. If you save these changes and reboot, the computer applies the changes to the BIOS and how the BIOS instructs the hardware to operate.
Below is a list of things you can do using BIOS settings on a Windows PC.
- Create or remove BIOS password
- Update BIOS
- Alter the order of booting
- Change time and date
- Change settings on the hard drive
- Load defaults on BIOS setups
- Changes settings on Floppy drive
- View the installed memory size
- Change fan speeds
- View system and CPU temperatures
- View voltages in your system
- Alter settings on DVD/CD/BD drives
- Change the Numlock on the Boot-Up
- Disable or enable RAID
- Change CPU settings
- Disable or enable BIOS Caching settings
- Disable or enable computer logo
- Disable or enable the POST
- Change the ACPI suspend type
- Disable or enable BIOS control of your system resources
- Change setting on power-on
- Alter power button function
- Reset ESCD— Extended System configuration Data
- Change display on multi-display setups initialized first.
- Disable or enable internal cache CPU settings
- Alter memory settings
- Change system voltages
- Disable or enable onboard IEEE1394
- Disable or enable ACPI
- Disable or enable onboard parallel or serial ports
- Disable or enable onboard audio
- Disable or enable USB onboard
- Disable or enable the onboard floppy controller
- View fan speeds
Conclusion
I hope the above information has resolved the issues you had with BIOS, answered your questions and curiosity about this computer component, or learned something new.
